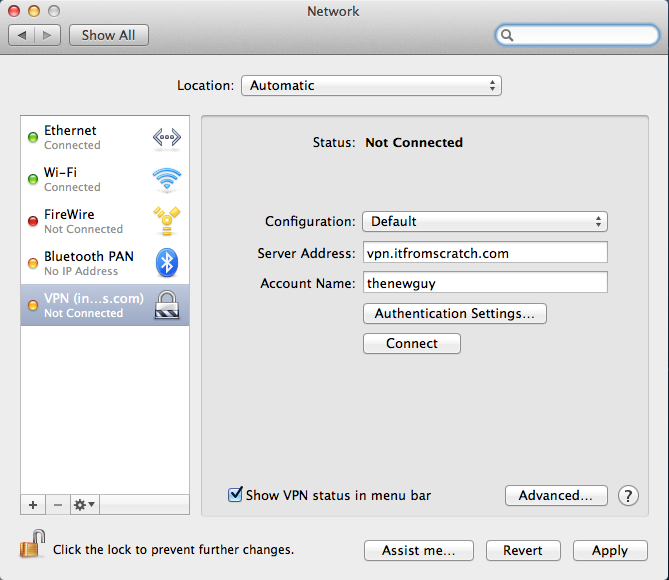
I was setting up the firm’s virtual private network (VPN) and testing out a few different configurations when I realized that I couldn’t delete the profiles I’d loaded from the System Preferences app. Though they don’t make it easy, there is a way to delete a Mac VPN profile. Read on to learn how.

The minus sign to delete the profile is disabled.
Typically when you’re trying to change any network configurations on your Mac you’d go to the Network section of the System Preferences app. From this screen you can add, edit, or delete any network profile except for VPN profiles.
To delete a VPN profile, you have to go to the command line.
Open the Terminal app and issue this command:
networksetup -listallnetworkservices
The terminal will display all the network profiles you have configured on your Mac (any inactive profiles will be marked with an asterisk). When you find the name of the profile you want to delete issue this command:
networksetup -removenetworkservice [name of service to be deleted]
When you’re putting in the name of the service you’re going to delete, be careful of spaces and special characters. The terminal doesn’t like those, so be sure to escape them with a backslash (). For example if the network service is named “My Awesome VPN!” you’d issue the delete command like this:
networksetup -removenetworkservice My Awesome VPN!
Depending on your security settings, the computer will probably prompt you for your administrator password at this point.
After you’ve issued the command to delete the VPN profile, you can check to make sure that you deleted the correct one and still have all the others that you need by issuing the same command as before:
networksetup -listallnetworkservices
And there you have it: a Mac free of superfluous VPN profiles.
For more useful articles click here to follow IT From Scratch on Twitter.
thanks a lot